|
|
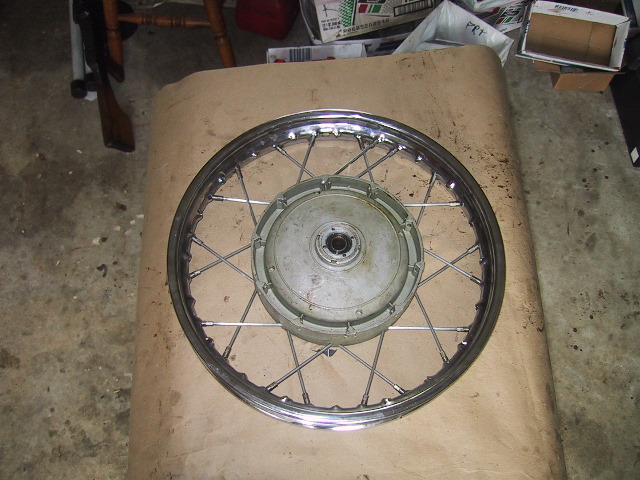
Repairing The Wheel
Tools Needed: Six point 10 mm socket, ratchet wrench, 2" extension, Driver handle for socket, in/lb torque wrench, Tool kit spanner for spokes, axle or wheel stand, Vise Grips, penetrating oil, grease and/or Anti-seize.
Time Required: 2 hours, longer if spokes and nipples are corroded together.
Note: If you re-use the old spokes and they are stretch out and/or bent; you will have a difficult, if not impossible time trying to get a "True" wheel. You might end up with a serviceable wheel, but you will need to adjust it more often and you will also have a higher chance of cracking the nipple seats, breaking spokes or stripping the nipples. My advice is to always use new spokes and nipples.
 It is only necessary to completely disassemble a wheel when the hub or rim needs to be changed. Individual broken spokes may be replaced as needed using the same steps that follow. |
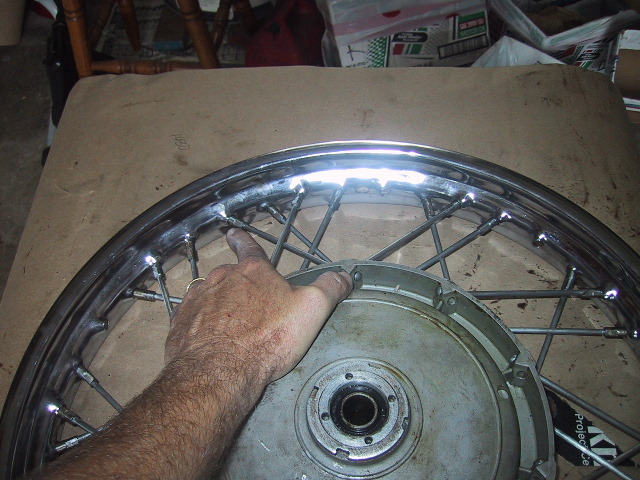
 The Russians were nice enough to use nipples that have a 10 mm base to them which makes this job much easier. Before beginning, spray the nipple and spoke threads liberally with a penetrating oil. |
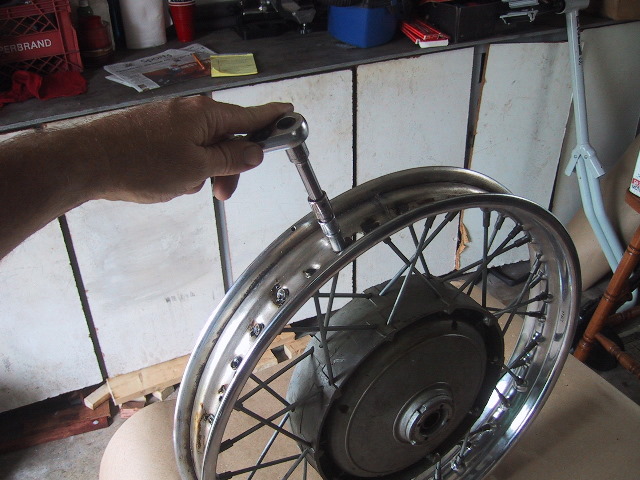 Use a ratchet and 6 pt. 10 mm socket to break the nipples loose. Do not use a 12 pt. socket or you will round off the nipple heads. If, due to corrosion, the entire spoke attempts to turn; use a pair of Vise Grips to hold the spoke while loosening the nipple. In rare cases, the spoke will need to be cut for removal. This is another reason you need to have new spokes and nipples on hand. |
 It is not mandatory, but best to loosen the spokes in the proper sequence as this keeps the rim from deforming and does not stress the spokes. Using the valve stem hole as a guide, start by loosening the first nipple past the hole, and then every third nipple until coming back to the valve stem hole. 1, 4, 7, 10, 13, 16, 19, 22, 25, 28, 31, 34, 37 and 40 is the first sequence...
|
 ...next, start with the 2nd nipple past the valve stem hole and every third nipple. This sequence will be; 2, 5, 8, 11, 14, 17, 20, 23, 26, 29, 32, 35 and 38. As you pass the valve stem hole for the second time... |
 ...finish by starting with the 3rd nipple past the valve stem hole and every third nipple with the final sequence of; 3, 6, 9, 12, 15, 18, 21, 24, 27, 30, 33, 36 and 39. |
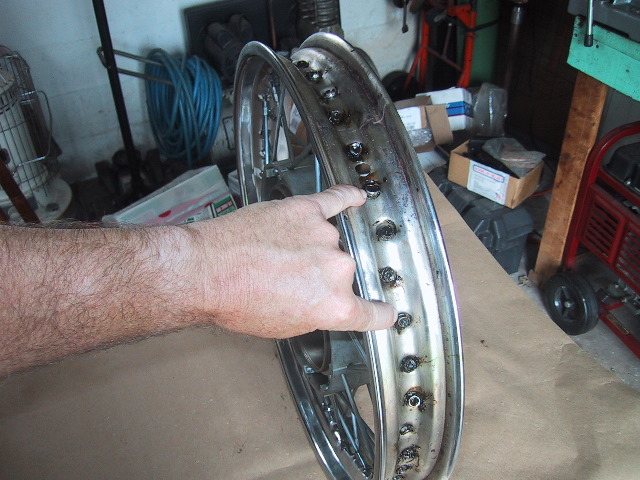
 Now use something like a socket driver with the 10 mm socket... |
 ...remove all the nipples.
|
 Remove all the lower top spokes... |
 ...by sliding them out. |
 Removing the lower spokes on the top half makes getting the top spokes out easier... |
 ...next pull out all the top spokes... |
 ...and you can now lift the rim off. |
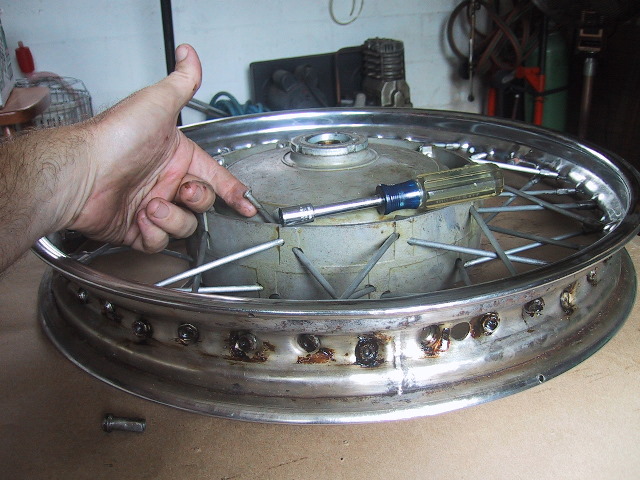
 Flip the hub over and remove the rest of the spokes. |
 The hub is stripped clean. Inspect the hub splines for wear and replace the hub if necessary...it can not be repaired for less than the cost of a new one. |
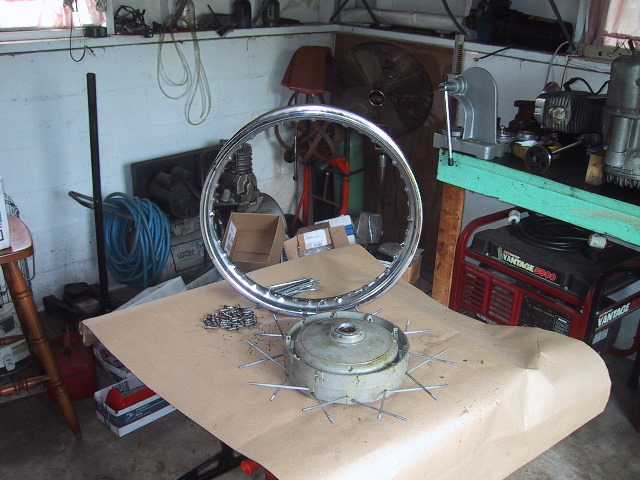
 While the rim is off, wire brush the rust off and polish it. Inspect it for any cracks, especially at the nipple bosses. |
 If you plan on re-using the spokes, examine each one carefully. Any where the heads are pulled straight like the one on the right must be discarded. This one was stretch out by improper torque technique. |
 Clean the old spokes and nipples on a wire wheel. Whether using the old or new spokes, coat the threads with grease or anti-seize. If you are using stainless spokes and nipples you must use anti-seize, not grease. |
 To reassemble the wheel, place the hub brake drum side up and place the rim with the valve stem hole at 12 o'clock. It does not matter which way you orient the rim, the OEM rim holes are all at the same angle. Be careful with an aftermarket rim as it may need to be oriented a specific way for the spoke holes to line up.
|
 Align a set of hub spoke holes with the valve stem hole and insert a spoke through the upper 12 o'clock spoke hole in the hub and guide the spoke through the 3rd rim hole to the right of the valve stem hole. |
 A close up view of the first spoke through the 3rd rim hole right of the valve stem hole. |
 Spin the nipple on until the spoke with the socket driver until the threads are just covered up. Repeat this for all of the upper spoke holes on the hub. |
 A view of the wheel with the first set of spokes in... |
 ...notice the pattern of 3 empty spoke holes between each of the first set of spokes. |
 Go back to the 12 o'clock position and slide a spoke through the lower hole underneath the first upper spoke you put in. Notice this spoke goes left of the valve stem hole. Tighten the nipple until it covers the spoke threads. |
 A view of the 1st lower spoke in place. Repeat for the rest of the lower spoke holes on the brake hub side of the wheel. |
 Overview of the completed brake hub side of the wheel. |
 Flip the wheel over so the hub side is facing up... |
 ...again position the valve stem hole at the 12 o'clock position. Just as with the other side, place the first spoke (next to my thumb) in the uppermost hub hole at the 12 o'clock position and feed it into the 3rd rim hole to the right of the valve stem hole and tighten up the nipple to cover the threads.
|
 A view of the wheel with the 3rd set of spokes in place. |
 Start the 4th set of spokes again at the lower 12 o'clock hole position of the hub, note again this spoke enters the rim to the left of the valve stem hole. Continue installing the spokes and nipples... |
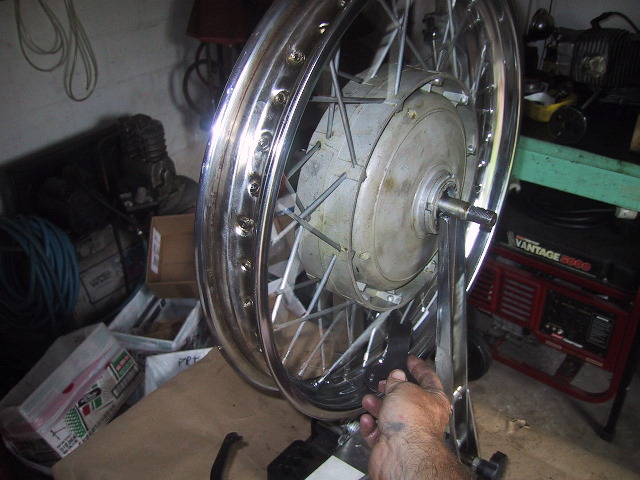
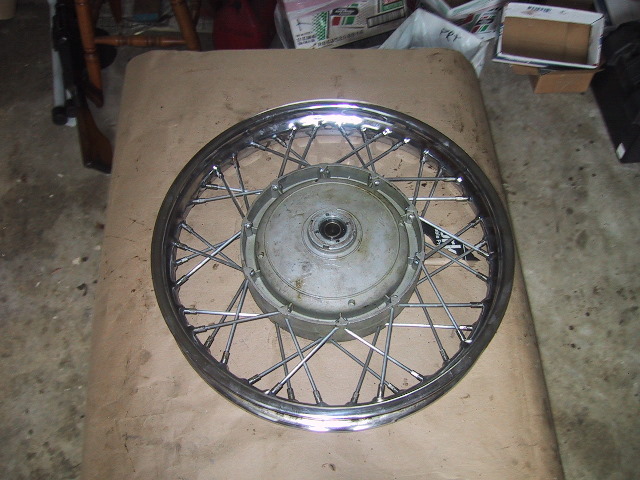 ...until the wheel is finished like above. Now the wheel spokes can be torqued. |
 To torque the spokes you will need to devise a stand of some sort. One can be made by clamping an axle in a vise...
|
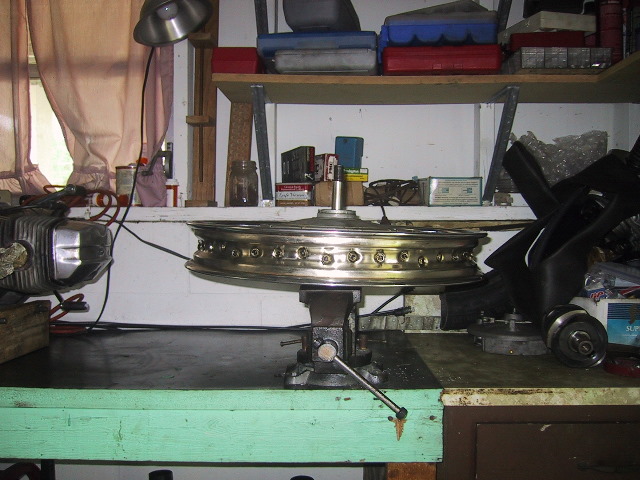 ...and sliding the wheel assembly on top of it. You could True a wheel this way by nailing bar stock or a cut piece of coat hanger to the table as an indicator for estimating the run-out and wobble of the wheel. |
 To torque the spokes, an inch/pound torque wrench will be needed with a 6 pt. 10 mm socket. I find a 1/4" drive socket works best as it has thinner walls. I use a 3/8" to 1/4" adapter for the socket. |
 Spoke torque is 42 to 48 inch/pounds (3.5 to 4 ft/lbs.), I use the lower setting to be safe and not bugger things up. The next part is the fun part. Go slow. Take your time and do it right. It is easy to get confused and get out of sequence when tightening the nipples. The wheel will look like a pretzel and you will need to loosen all the nipples and begin again if you screw up. |
 You will use the same sequence to tighten as you did above to loosen. Only tighten each nipple 1/4 of a turn! Use the valve stem hole as your starting point and begin with the 1st nipple on the right or left...your choice. It just depends which way you want to spin the wheel. 1, 4, 7, 10, 13, 16, 19, 22, 25, 28, 31, 34, 37 and 40. |
 Move to the 4th nipple and tighten not more than a 1/4 of a turn and continue with the above sequence until coming back to the valve stem hole. Then start the 2nd nipple sequence, 2, 5, 8, 11, 14, 17, 20, 23, 26, 29, 32, 35 and 38. And then the 3rd sequence. 3, 6, 9, 12, 15, 18, 21, 24, 27, 30, 33, 36 and 39. Now, repeat all 3 sequences again and continue repeating until the torque wrench "clicks" on all the nipples. |
 If you did everything carefully and correctly, the nipples will all come to torque spec. on their respective turn. You are now done. The wheel should be "True" as all the spokes are now at the same torque.
If you are lucky enough to have access to a a wheel stand like the one above the job goes quicker. |
 It is a good idea to keep count of each sequence as you complete it. Above, I have finished one complete set of 3 torques and I am starting the 2nd sequence of my second set. |
 It is not easy to see do to the camera flash, but it took four sets of the 3 sequences to reach the torque setting of 42 in/lbs on this wheel. Yes, you can bring the nipples to torque faster by turning them more than a 1/4 turn. But small increments of tightening will give you better results and you will not need to True the wheel if you use new spokes. |
 When done properly with new spokes, the spokes will not touch where they cross. You should be able to easily slip a knife blade between them. |
 If you re-use stretched spokes, some or all will touch at the cross like in the picture above. Eventually, these spokes will cut into each other and in extreme cases will fail. When torqued to spec. the wheel will still be out-of-round as the spokes are stretched to different lengths and are not uniform. This leads to spokes loosening and breaking. |
 I seal the end of each nipple with a dab of grease to keep the corrosion down. |
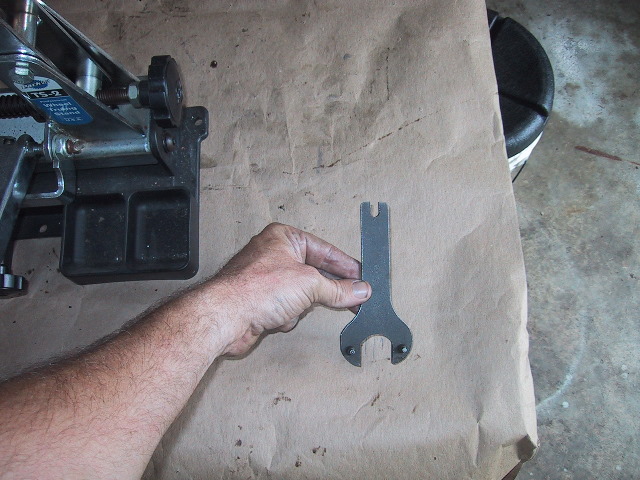 This is the OEM Ural spanner with the 6.8 mm notch used for tightening the nipples on the outside of the rim. |
 The not really so effective method of finding loose spokes is to spin the wheel and dangle the handle of the spanner across the spokes and listen to the "tinking" sound. If you hear a dull "boink" instead of a uniform tinking...you have found a loose spoke or spokes. |
 Place the notch in the spanner handle on the flats of the exposed nipple and turn CW to tighten. Just snug the nipple up. My finger is pointing in the direction of movement. Do not over tighten as this will stretch the spoke out or crack the rim boss for the nipple. |
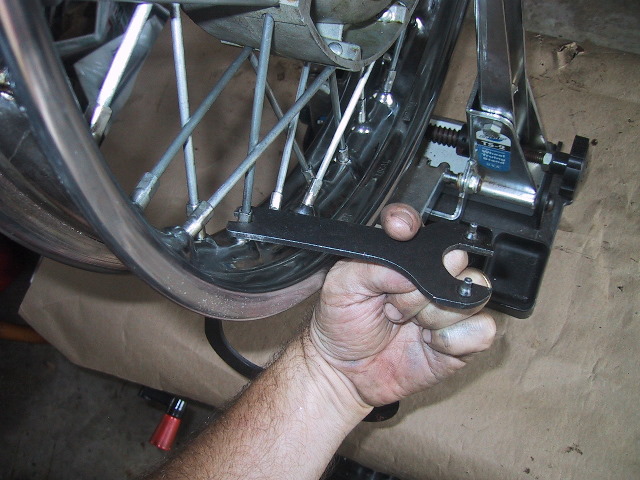 Everybody gets confused and thinks when tightening the nipples closest to you that they are CCW. Finger is again showing direction of movement. NO! There are no left hand threaded nipples. Never. All nipples are right hand thread. Righty tighty/lefty loosey applies at all times. |
The
"sequence" used above might be easier to understand if you see it
written like so... 1, 4, 7, 10, 13, 16, 19, 22, 25, 28, 31, 34, 37, 40 2, 5, 8, 11, 14, 17, 20, 23, 26, 29, 32, 35, 38 3, 6, 9, 12, 15, 18, 21, 24, 27, 30, 33, 36, 39 ...and read it left to right, top to bottom. Pretty simple huh? You can now see why torquing or loosening the spokes in this pattern is important. It evenly distributes the force around the rim. With a little imagination, you can figure out what can happen to the wheel when this sequence is not observed. |
|
|
|