|
|
|
|
How the Gearbox Works
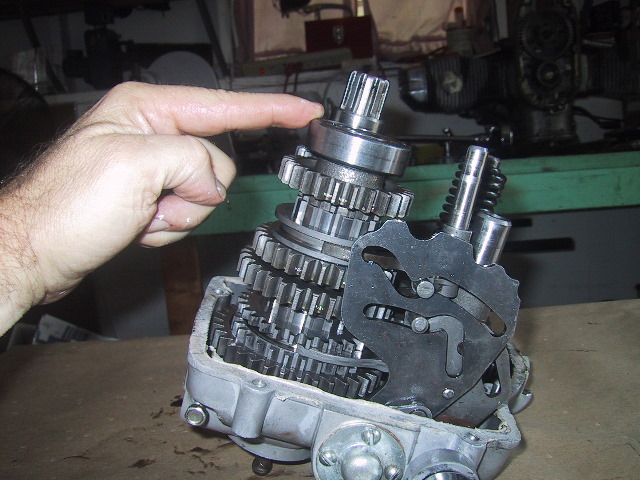 This is the back half of the gear box standing on end. I am pointing to the main shaft, the aft end of which has the flexible coupling (yoke) the the rubber driveshaft doughnut slip onto. Just below my finger is the forward #304 bearing. There is one more on the output end of the shaft. These bearings hold the components of the main shaft in place. |
 This is 4th gear... |
 ...this is the 3rd/4th gear shift sleeve, just ahead and underneath, you can see the first of two main shaft sleeves which are splined to the main shaft and do not free spin, but turn with the main shaft. |
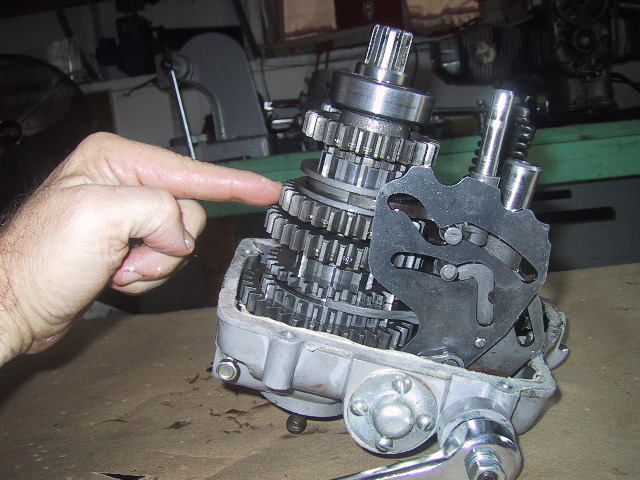 Here is the 3rd gear... |
 ...followed by the 2nd gear. |
 This is the 1st/2nd gear shift sleeve. Just above is the second splined main shaft sleeve which is coupled via splines to the main shaft. The 1st/2nd shift sleeve is toothed and is what the reverse idle gear meshes with when reverse is selected with the neutral/reverse shift lever. |
 This is 1st gear. All of the gears are free spinning on the main shaft. Along the inner diameter face of each gear are teeth which mesh with the respective shift sleeves via a fork. The shift sleeves engage both the selected gear and the fixed main shaft sleeves to lock them together on the main shaft. |
 Here you can see one arm of the 1st/2nd shift fork in the groove of the 1st/2nd shift sleeve. |
 This is the fork for 3rd/4th gear. |
 The large metal plate is the shift quadrant, I am pointing to the 1st/2nd shift fork pin, above is the pin for the 3rd/4th gear fork. The fork pins ride through the guide slots as the foot shift lever is pressed, moving the forks to force the shift sleeves onto the selected gear or to a neutral position on the main shaft sleeve. |
 This is the forks shaft. The shaft slides through a bushing in each fork... |
 ...here you can see the 3rd/4th shift fork better. |
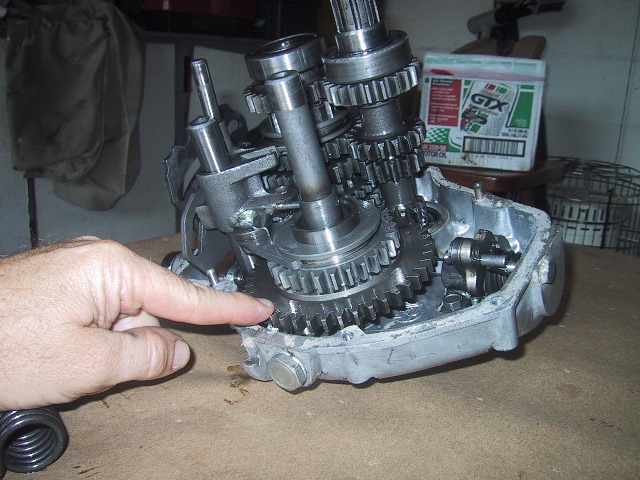
 This is the idle bracket assembly shaft... |
 ...and this is the idle bracket assembly. Just to the right of my finger you can see 3 teeth of the idle gear. The idle gear transfers power from the main shaft to the reverse gear via the toothed 1st/2nd shift sleeve. |
 Here is the 12 mm retaining bolt and lock washer for the idle bracket assembly. |
 Here is the clutch shaft. The splines are what stick out from the front case (case not shown) and engage the clutch plates and disks in the flywheel. |
 This is the 4th gear of the clutch shaft. It is the only gear which can be removed from the shaft. 4th gear is keyed to the clutch shaft and held in place by the #205 bearing on the front of the clutch shaft. Just ahead of the bearing is the clutch shaft sleeve and underneath that is a washer called the clutch release slider ring. |
 Here is the 3rd gear of the clutch shaft... |
 ...followed by the 2nd and 1st gear. Just below my finger the #12204 bearing is just visible. When the clutch shaft is removed, the outer race for this bearing will remain in the rear gear box housing. You will need an inside type puller to remove the outer race from the housing. |
 This is the kick start shaft... |
 ...and kick starter return spring. To remove the gears from the kick starter shaft, the retaining pin for the spring must be driven out.
|
 Kick starter return spring easily slides of the shaft. |
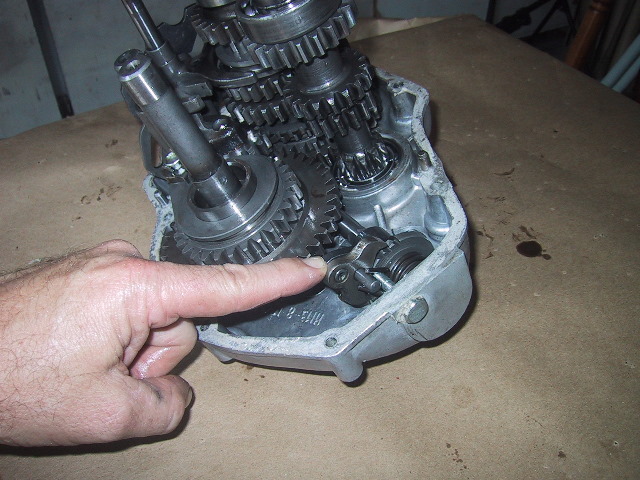
 Here is the reverse shift fork sitting in the reverse gear shift sleeve... |
 ...which is part of the reverse gear. |
 This is the kick start gear. |
 This bolt is the return spring stop for the foot shift mechanism. You can see the spring just to the right of my middle finger. |
 This is the internal part foot shift mechanism. I am pointing to the ratchet crank which engages the...
|
 ...ratchet wheel, which turns the...
|
 ...shift quadrant shaft (hard to see, but in-line with my finger) that moves the shift quadrant and forks.
|
 This is the right hand cover which is a cap over the other end of the shift quadrant shaft. This cover needs to be removed when performing the gearshift adjustment procedure. A 10mm wrench is used on this end of the shaft to "feel" when adjusting the up and down shift set screws on the back of the gear box, left side (not pictured here).
|
 Here is the reverse/neutral shift lever shaft. The shaft goes through the reverse shift quadrant plate and terminates against the idle bracket assembly shaft. |
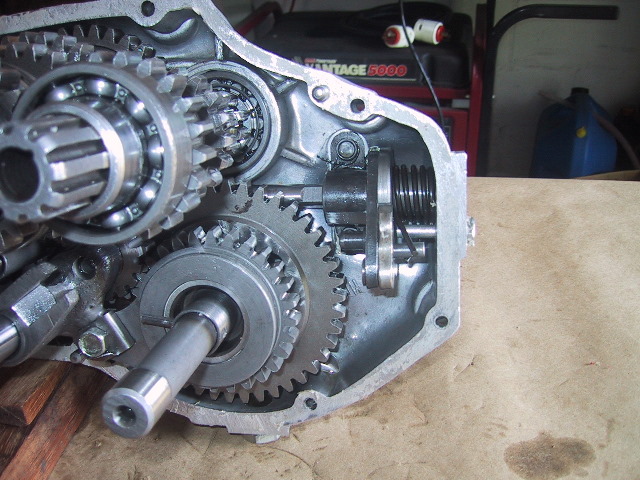
 Here the gear box is shown with the shift quadrant in the neutral position. |
 A front view of the gear box in neutral. On the right side you can see the ratchet pawl is below the 3 notches in the ratchet wheel. The notches from bottom to top are 2nd, 3rd and 4th gear. |
 The engine/clutch turns the clutch shaft CW as seen form the front. When using the forward gears... |
 ...this turns the output end of the main shaft CW as seen from the rear.
|
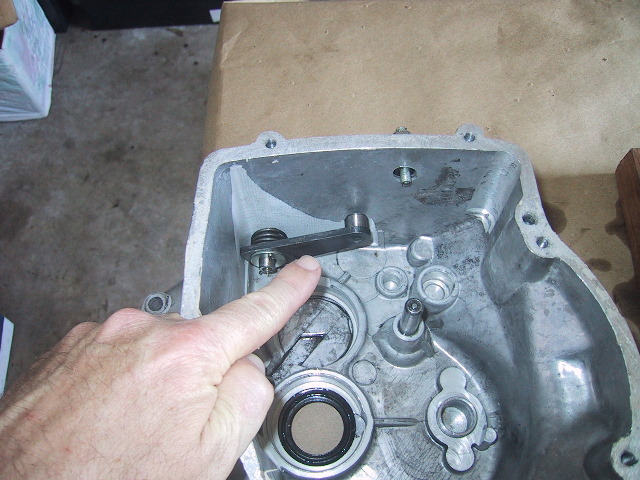 In the front half of the case on the right side is the shift quadrant latch assembly. This spring loaded lever rides the notches in the face of the shift quadrant to hold the quadrant in the selected gear position. The older 650cc gear boxes used a spring loaded ball bearing in place of the latch assembly. |
 To shift from neutral to 1st gear, push down once on the foot shift ratchet crank, then turn the clutch shaft CW while pressing down slightly on the shift quadrant. The 1st/2nd shift sleeve will slide aft off the main shaft sleeve and engage 1st gear. I am pointing to the notch in the shift quadrant for 1st gear. The latch lever in the previous picture would roll into this detent if the two case halves where together. |
 It is a little difficult to see in this picture, but the 1st/2nd toothed shift sleeve has moved back flush with the 1st gear at the back of the case. The back half of the shift sleeve is engaging the small teeth around the I.D. of the 1st gear while the front half of the shift sleeve is engaging the main shaft sleeve which is splined to the main shaft. Now 1st gear is locked to the main shaft while the rest of the gears spin free. |
 To shift into second, depress the foot shift ratchet crank slightly, slowly turn the clutch shaft CW and press down slightly on the shift quadrant. I am pointing to the 2nd gear detent in the shift quadrant.
|
 With my hand out of the way it looks like this. |
 The 1st/2nd shift sleeve has now moved up to engage the I.D. teeth on the back of the 2nd gear along with the main shaft sleeve underneath. Note the ratchet crank has engaged the 2nd gear notch in the ratchet wheel on the right side of the picture.
|
 Closer view of ratchet mechanism in 2nd gear notch. Entering 3rd gear is the same drill; press down on the ratchet crank to disengage the ratchet wheel, turn the clutch shaft CW and press down slightly on the shift quadrant until the 3rd/4th shift sleeve engages 3rd gear. |
 Detent for 3rd gear... |
 Clear view of shift quadrant in 3rd. |
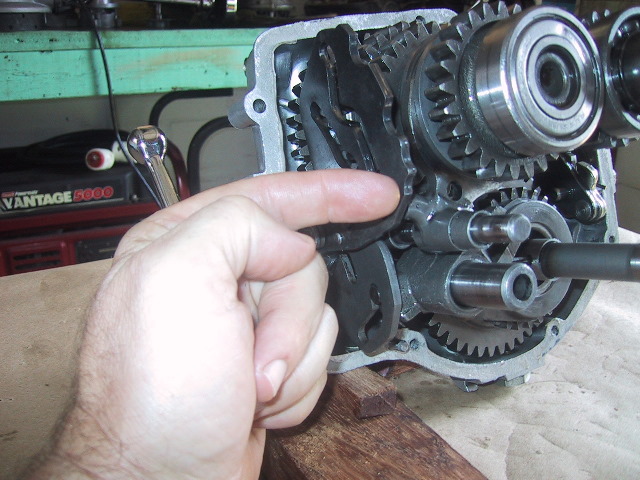
 The 1st/2nd shift sleeve (under middle finger) is now riding on the main shaft sleeve while 1st and 2nd gear are free spinning. The 3rd/4th shift sleeve (index finger) has dropped back engaging 3rd gear and the first main shaft sleeve which is just visible ahead of the shift sleeve. |
 The ratchet crank is now in the detent for 3rd gear. To shift into 4th, repeat the above steps again. |
 Pointing to detent in shift quadrant for 4th. |
 Side view of shift quadrant in 4th. |
 Ratchet crank in 4th gear position.
|
 3rd/4th shift sleeve has moved forward to engage 4th gear. Return to neutral by depressing the ratchet crank to disengage the ratchet wheel, turn the clutch shaft CW while lifting up on the shift quadrant until you return back to 1st gear. Then use the reverse/neutral lever to put the gear box into neutral |
 To get into reverse, rotate the clutch shaft CW while pressing lightly aft on the reverse/neutral lever (from the neutral position). |
 As you move the reverse lever aft, the reverse shift quadrant moves up which blocks the forward gears shift quadrant and allows... |
 ...the reverse fork to push the reverse gear aft. There are fingers on the back of the reverse gear that must fall into holes on the kick starter gear... |
 ...like so. The grinding you hear and feel when engaging reverse are these pins falling into place. |
 The reverse gear now meshes with the idle assembly gear which meshes to the toothed 1st/2nd shift sleeve on the main shaft. Recall that in "Neutral" the shift sleeves (with forks) are riding on the main shaft sleeves which are splined to the main shaft. All the other forward gears are not locked to the main shaft and are free spinning in neutral. |
 Here is a better view of the reverse gear meshed to the idle which is meshed to the 1st/2nd toothed shift sleeve on the main gear. Now as the clutch shaft is turned CW the idle gear turns the... |
 ...1st/2nd shift sleeve (index finger) and main shaft (middle finger)... |
 ...CCW so the drive shaft moves the motorcycle in reverse. Quite a simple and ingenious system. |
 Side view of the shift and reverse shift quadrants while in reverse. |
 Note how the reverse shift quadrant (index finger) when engaged; blocks the shift forks so the gear box can not be engaged in forward gears at the same time. |
|
Moving the reverse lever forward drops the reverse quadrant back to the stop pin... |
...which pushes the reverse fork forward disengaging the pins from the kick start gear and returning the gear box to a neutral condition. |
 This is the contact for the neutral... |
 ...switch on the front half of the case. |
 Gear box back in neutral. |
|
|