|
|
|
|
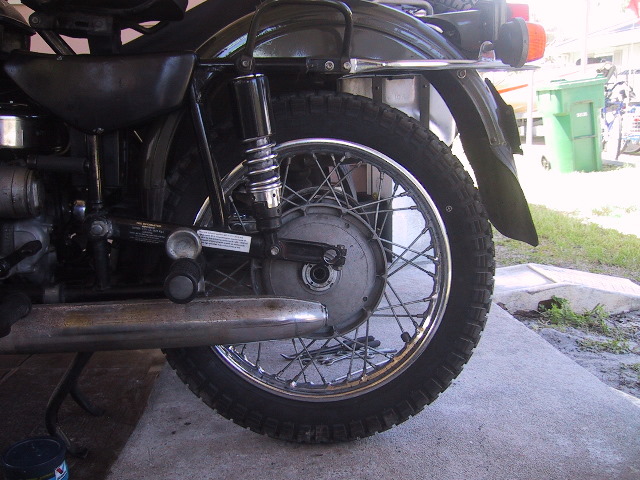
Final Drive Removal & Installation (Wheel Removed)
Note: This is for Patrol and Gear-Up models only.
Tools Needed: Jack, screwdriver, 17mm, 12mm wrenches, grease and solvent.
 Chock the front tire and jack the sidecar tire up enough to allow it to spin. Later, this will allow you to turn the driveshaft to line the U-joints. |
 You can remove the brake shoes and service them at this point too. |
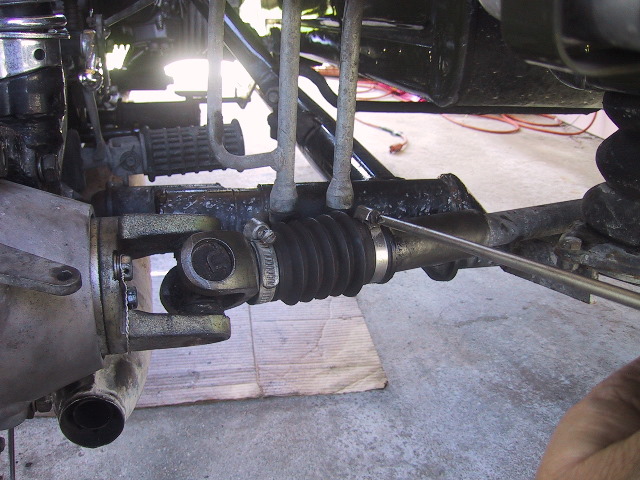
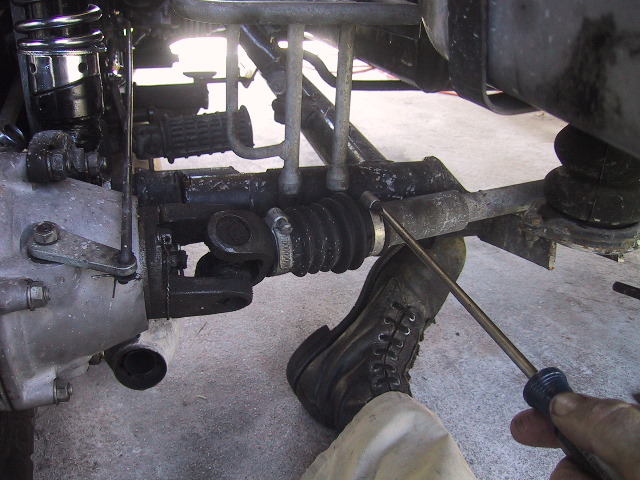 Use an appropriate screwdriver to loosen the clamp holding the rubber gaiter on the driveshaft. It is also a good idea to make some alignment marks on the U-joint and driveshaft (right of the gaiter) to assist in proper assembly later. |
 Pull the rubber gaiter out of the driveshaft keeper groove. |
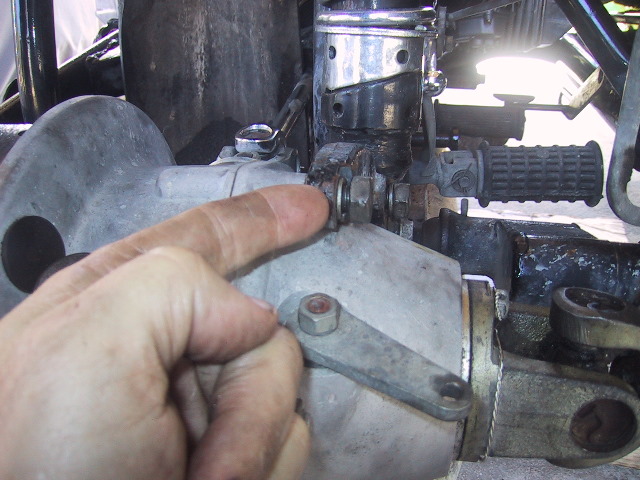
 Use your fingers to squeeze the cotter pin together that holds the 2wd engagement rod to the lever...
|
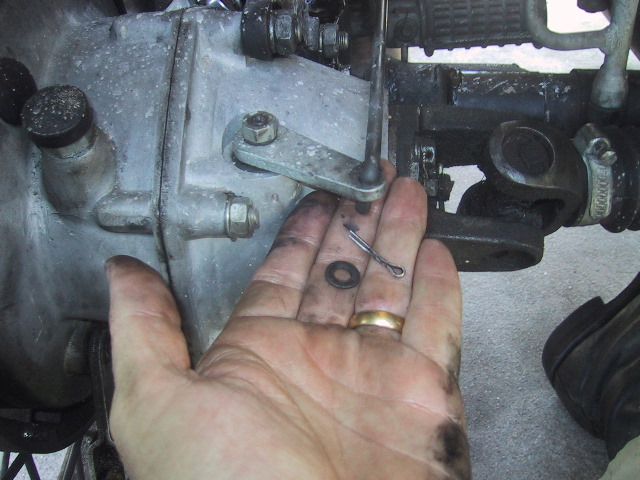 ...remove the pin and washer...If you have not done so yet, remove the barrel nut from the foot brake rod on the bottom of the final drive. |
 ...put the washer back on the rod and slip the cotter pin through the hole and place the rod on the driveshaft guard/step.
|
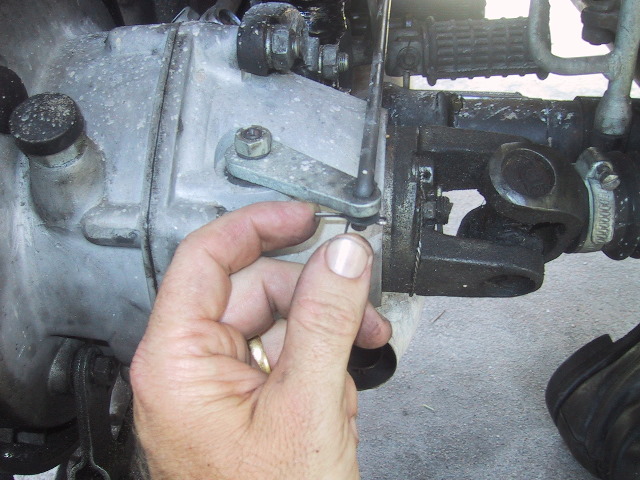
 Use the 17mm wrench to remove all 4 final drive nuts and lock washers.
|
 One down, 3 to go.
|
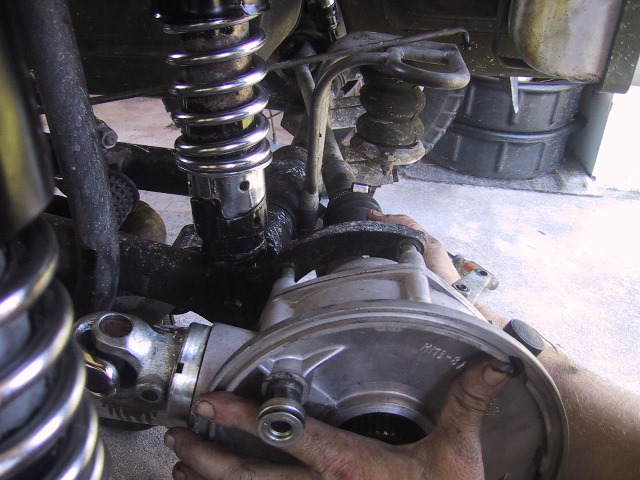
 With the nuts removed you can now pull the final drive to the left freeing it from the swing arm and driveshaft....
|
 ...at about the same time just pull straight back and the final drive will pull free of the output shaft rubber doughnut and yoke. |
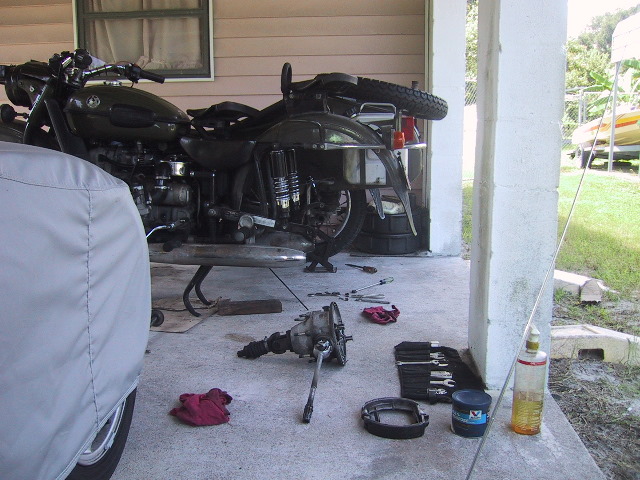 Final drive ready to be cleaned.
|
 The little hole just below the wheel splines is the over-flow for the gear oil. If any oil should get past the seal it will trickle down this hole and coat your rear rim. Make sure it is not clogged with any crap. |
 You can see where the drain hole is in the casting here.
|
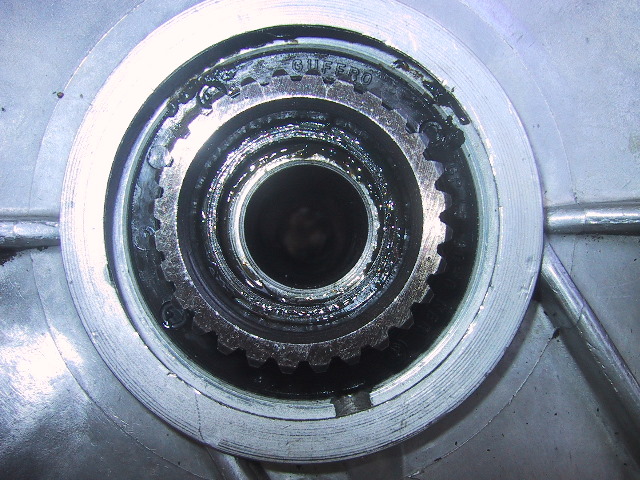
 Check the condition of the splines on your final drive and wheel hub. If they are worn to sharp points like this; it is time for a rebuild of the final drive.
|
|
For comparison, these look brand new. I lightly grease the splines with red high temp disc brake grease. Not too much or it can contaminate the brake shoes when it heats up.
|
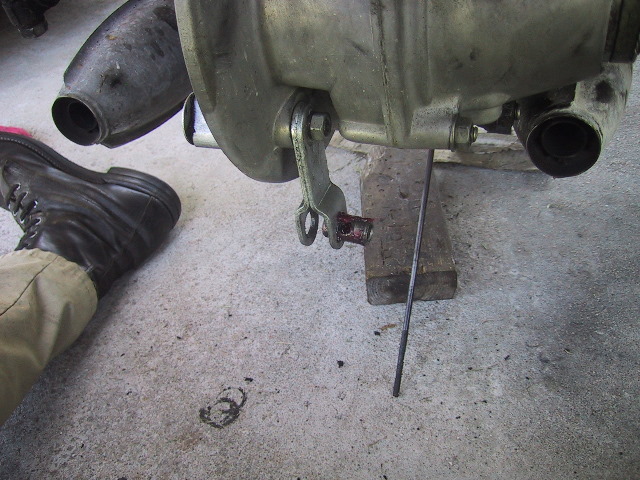
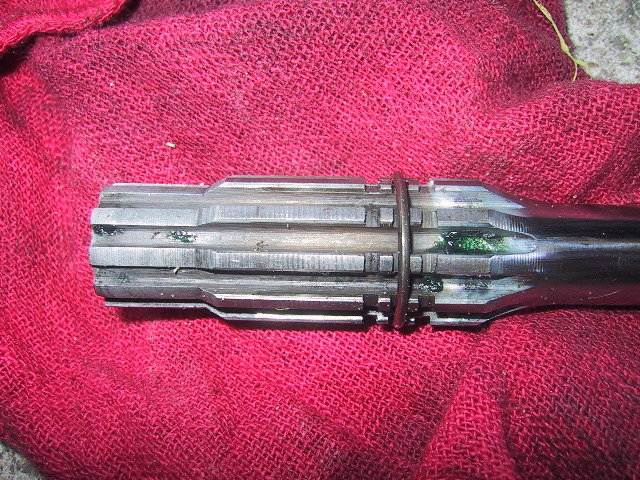 Check the condition of the drive shaft splines and the C-clip. If either are damaged replace them. Note the clip is in the middle position.
|
 Check the sidecar driveshaft splines for wear/damage. It is common to have water damage due to leaks in the gaiter if you make water crossings.
|
 Before installing the final drive, grease all splines with your favorite grease. If you are on the side of the road, set the driveshaft on some object and turn the sidecar short axle up; this will keep the splines out of the dirt. |
 To re-install the final drive, I slide under the bike from the left with the final drive on my lap. I insert the driveshaft splines into the finger yoke on the rubber coupler...
|
 ...and then align the sidecar drive U-joints...
|
 It's not absolutely mandatory, but recommended to align the finger yoke on the coupler with the yoke (stirrup) on the driveshaft U-joint. |
 A view looking up the driveshaft from the final drive with both yokes aligned. |
 It is extremely import to get both yokes on the sidecar driveshaft aligned together precisely (this is where the alignment marks from above come in handy)...
|
 ...they should be mirror images of each other, NOT 90 DEGREES APART. Just a spline or two off with throw the driveshaft balance off and this will eat up the U-joints in short order. |
 With all the drive shafts in proper alignment, slide the sidecar splines in and continue pushing the final drive to the right engaging the mounting studs through the swing arm holes... |
 ...and everything clicks together. Remember, first seat the driveshaft fully into the doughnut/yoke, then align the U-joint stirrups on the sidecar axle and push the final drive onto the swing arm. |
Put the 4 washers and 17mm nuts on the final drive studs loose, not even finger tight. Explanation to follow. |
 Slide the rubber gaiter back into the groove on the sidecar driveshaft... |
 ...and tighten the clamp just snug enough that the gaiter will not turn on the shaft. |
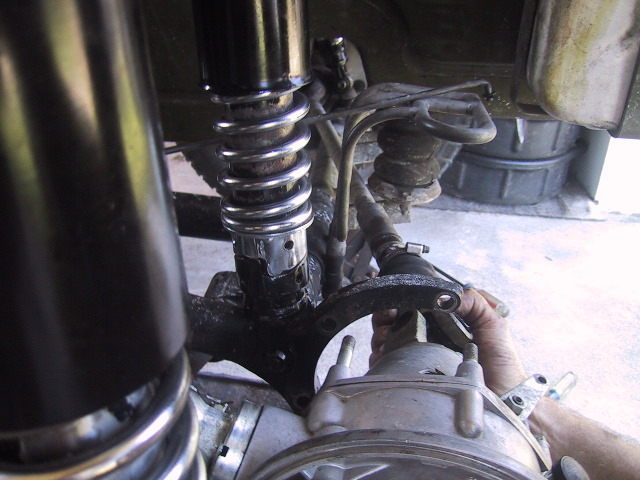
 Put the 2wd lever linkage back on the final drive lever and put the washer and cotter pin back on to secure it. |
 Grease the barrel which holds the foot brake rod and insert it into the rear brake lever arm. |
 Getting the rod through the barrel can be a trick...I use my toe to depress the foot brake and slide the rod through. A helper to depress the pedal is a must for those folks height challenged. |
Get the rear brake adjustment screw... |
 ...and just screw it on the rod a few turns. |
 Have the cleaned and greased axle sitting up by the center stand so it is within reach... |
 ...roll the rear wheel between the fender and swingarm... |
 ...ease it into position... |
 ...lift it up and mount the wheel to the final drive drum, turning slightly to engage the wheel splines to the driven hub splines. |
 Insert the tip of the axle into the swing arm guide hole... |
 ...and with your other hand hold the dust cover... |
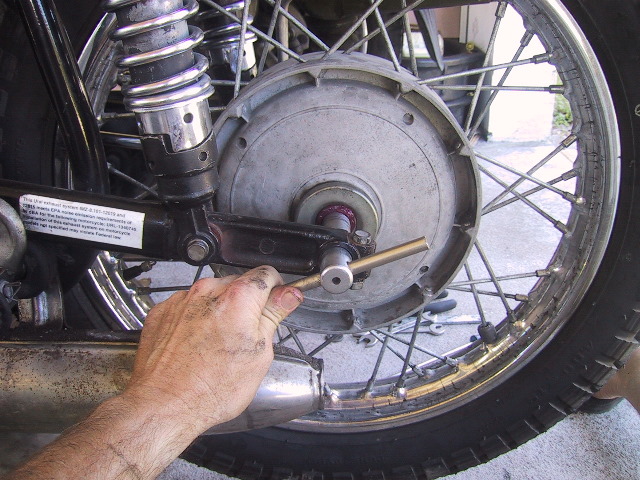 ...slide the axle through the wheel hub with the free hand. |
 Put the ring spacer over the axle between the U-joint. |
 Next, turn the castellated nut on the axle. |
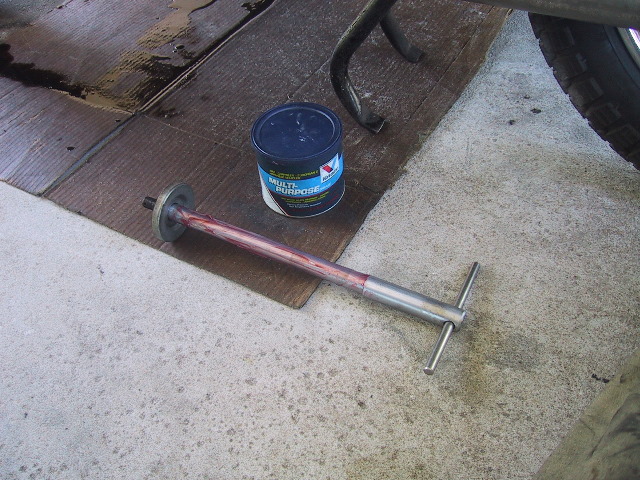
 Place the URAL slogging wrench on the nut... |
 ...and use the tommy bar to tighten the axle CW until tight. Needs to be more than snug, but not he-man tight. |
 Using pliers, slip the cotter pin into the hole in the axle to retain the castellated nut. |
 Grab the long arm of the cotter pin with the pliers and while pulling it toward you... |
 ...turn the axle CCW with the tommy bar. This will bend the cotter pin quite nicely. |
 Now tighten the 17mm swing arm nuts. This will allow the final drive to center on the axle as the nuts are tightened up. If the nuts are tightened before the axle is run through, it can be difficult to push the axle through and may cause stress on the bushings in the final drive. |
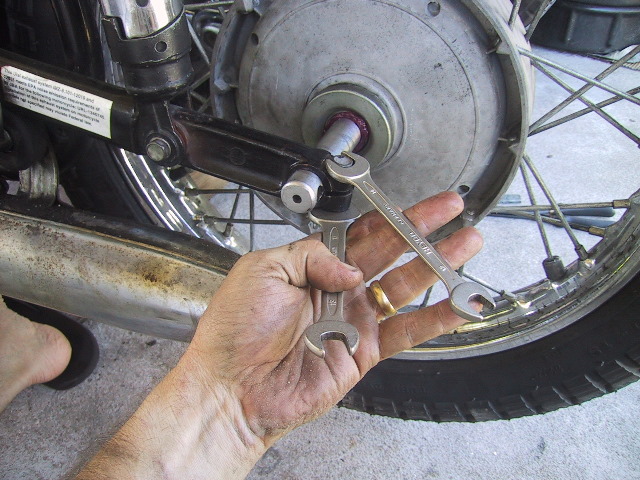 Using the 17mm and 14mm wrenches, tighten the pinch bolt. A little tighter than snug will do. |
 Adjust the rear break nut with the 12mm wrench and the job is done. |
|
|